
If your car’s been feeling a little sluggish lately, don’t blame it just yet—it might be your catalytic converter crying out for some attention.
This small, often-overlooked component works tirelessly to scrub your exhaust clean, but like any hard worker, it needs a good detox once in a while.
Whether you’re a hands-on DIYer or someone who’d rather not get their hands dirty, cleaning a catalytic converter can restore performance, improve mileage, and even save you from a pricey replacement.
Let’s look at three smart ways to get that converter breathing freely again.
Cleaning a Catalytic Converter
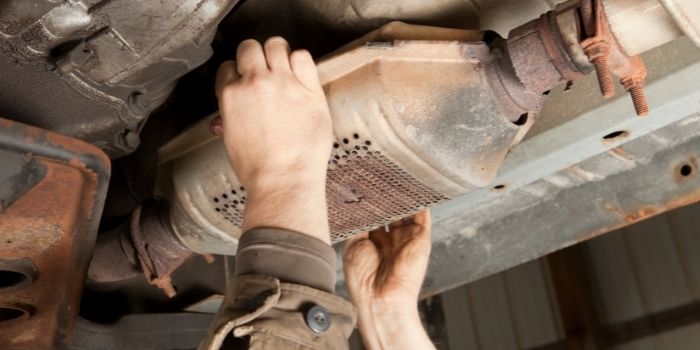
Before you start, the converter needs to be removed from the exhaust system.
Loosen the retaining clamps and flange bolts carefully. Some smaller converters may not have bolts and can be detached more easily, but larger ones usually require more effort.
Pro Tip: Be cautious not to damage the exhaust gaskets while removing the converter — a damaged gasket can cause exhaust leaks and even trigger check-engine lights later.
Once you’ve got the core out, you can proceed with one of the three cleaning methods below to clean a catalytic converter — depending on how clogged it is and the tools you have on hand.
1. Compressed Air Cleaning
This is the simplest method — ideal for light carbon or ash buildup.
Using a rubber-tipped air nozzle, direct compressed air into both the inlet and outlet faces of the converter’s core. This helps dislodge dust, soot, and light contaminants trapped in the honeycomb cells.
Safety Note: Always wear a high-quality dust mask or respirator, as fine particles may become airborne during the process.
Start from the outlet side (where exhaust exits) and blow air through each cell, then repeat the process on the inlet side.
If the buildup is stubborn, repeat a few times or use a steam cleaner for a deeper clean (more on this below).
2. The Oven Method
When the converter is heavily carbonized, gentle air cleaning won’t cut it. That’s where the oven method comes in — a controlled heating process that burns off carbon deposits.
Use a ceramic or heat-treating oven capable of reaching around 1050°F (565°C). Bake the converter’s core for about 2–3 hours to allow the carbon to oxidize and burn away.
Important: Never exceed the temperature or duration — excessive heat can melt or warp the ceramic substrate and ruin the catalyst coating.
For best results, pre-treat the core by spraying a high-quality oven cleaner or catalytic-safe degreaser through it, letting it sit for 10–15 minutes before baking.
3. Soaking in a Cleaning Solution
For a less aggressive but effective method, soak the converter’s core in a cleaning solution.
You can use a commercial catalytic cleaner (like State 999 or Super Concentrated Gunk detergent) or a DIY mix of hot water and lacquer thinner.
Submerge the core completely and let it soak for about an hour to dissolve oily residues and carbon buildup.
After soaking, rinse thoroughly with clean water and blow-dry using compressed air. Repeat the soak if needed until the honeycomb looks clean and unclogged.
Finally, reinstall the converter with a new gasket (or reuse the old one if in good shape), tighten the clamps and bolts, and you’re good to go.
How to Steam Clean a Catalytic Converter?
If your catalytic converter has seen better days and lighter cleaning methods just aren’t cutting it, steam cleaning might be the boost it needs.
This technique uses the power of high-temperature steam to melt away carbon, oil, and soot that clog the converter’s honeycomb core — restoring smoother exhaust flow and better fuel efficiency.
But make no mistake — this isn’t your everyday car wash. It requires careful handling, the right tools, and some mechanical patience.
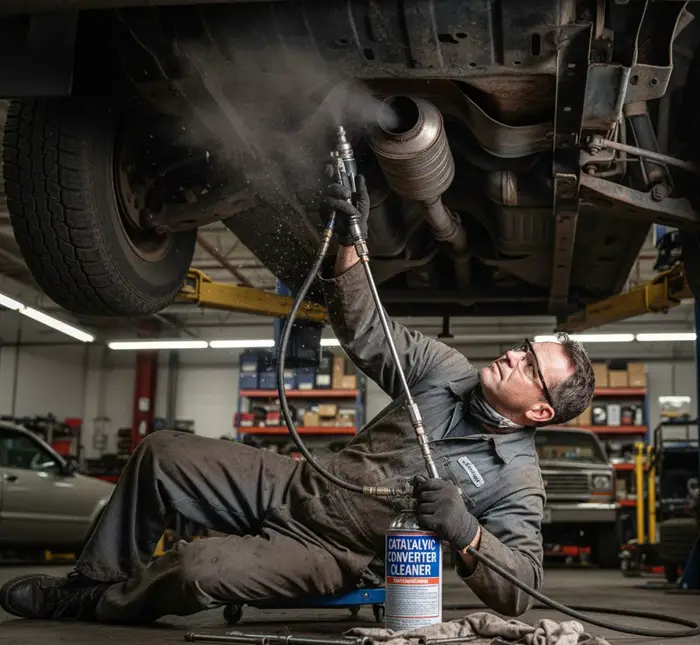
Steam cleaning a catalytic converter involves directing pressurized, high-temperature steam into the converter’s inlet and outlet passages.
The heat and moisture help loosen and flush out stubborn carbon deposits that ordinary air or detergent cleaning can’t reach.
It’s especially effective on converters suffering from excessive carbon fouling due to rich fuel mixtures, oil leaks, or prolonged idling.
1. Remove the Catalytic Converter
Begin by removing the catalytic converter from the vehicle.
Loosen the retaining clamps and flange bolts carefully, making sure not to damage the gaskets or oxygen sensor connections in the process.
Tip: Label the bolts or take a photo before disassembly — it’ll make reinstallation smoother later.
2. Prepare Your Steam Cleaner
Use a professional-grade steam cleaner capable of maintaining a steady, high temperature (typically around 250–300°F / 120–150°C).
Check the manufacturer’s settings and ensure consistent pressure output. Subpar or uneven steam flow can leave parts of the converter uncleaned.
3. Steam Clean the Core
Direct the steam nozzle into both the inlet and outlet ports of the converter. Move it slowly and evenly to target all the honeycomb passages.
You’ll notice carbon and residue softening or dripping out — that’s a good sign. If the buildup is severe, repeat the process a couple of times until the exhaust passages appear visibly cleaner.
Caution: Avoid placing the nozzle too close to the ceramic substrate — excessive pressure can crack the internal structure.
4. Dry the Converter
Once cleaning is done, the converter must be thoroughly dried before reinstalling. Let it sit in a warm, ventilated area or use compressed air to remove residual moisture.
Any trapped water vapor can create condensation inside the exhaust system or trigger sensor errors when hot gases flow through.
5. Reinstall the Converter
Reattach the catalytic converter carefully, tightening the bolts and clamps evenly. Inspect all gaskets and O-rings — replace any that show signs of wear or cracking.
A small leak here can cause a big headache later, including poor performance or that dreaded “Check Engine” light.
Additional Tips and Considerations
Safety first: Always wear heat-resistant gloves, goggles, and a respirator mask. Steam can cause severe burns if handled carelessly.
Avoid shortcuts: Don’t steam clean the converter while it’s attached to the vehicle. Moisture can seep into sensors or nearby components and cause electrical issues.
Alternative option: If full removal isn’t feasible, consider using a fuel additive catalytic cleaner.
While it won’t unclog a completely blocked converter, it helps prevent buildup and maintain efficiency between deep cleanings.
How to Unclog Catalytic Converter Without Removing It?
Cleaning and unclogging the catalytic converter without removing isn’t very tough if you want to do it on your own.
Just make sure you check and listen for any loose parts inside and confirm whether the car is burning the oil properly.
If you can hear the loose parts, removing and inspecting the catalytic converter is important because the loose parts get even looser and clog your exhaust pipe. If that happens, your vehicle might stop completely.
After you have inspected it carefully, follow these steps…
Step 1. Get the catalytic converter cleaner
Using a good high-grade catalytic converter cleaner is one of the easiest ways to clean a catalytic converter without removing it.
You can use products like:
- Cataclean Engine and Catalytic Converter Cleaner
- Hi-Gear EZ Emissions Pass & Catalytic Converter Cleaner
- Oxicat Oxygen Sensor and Catalytic Converter Cleaner
OXICAT Oxygen Sensor & Catalytic Converter Cleaner is what I have used before.
Since it worked great for me, I can recommend this to anyone who needs to unclog the catalytic converter without removing it.
Step 2. Pour the cleaner into the fuel tank
You just need to pour OXICAT cleaner into your fuel tank.
Refer to the product manual and add the exact amount mentioned.
Doesn’t matter if it’s a petrol, diesel, or hybrid car; the cleaner will automatically help to clean the catalytic converter along with your O2 sensors and the whole exhaust system.
Here are a few things you need to remember while performing this step…
- The product will only work to clean a slightly clogged catalytic converter that has lost its power
- It will not repair any kind of mechanical faults inside your catalytic converter like if it’s cracked or broken
- Do not add too much of the cleaner solvent than required as it can cause even more damage
Step 3. Test your car by taking it for a short drive
Once you have cleaned the clogged catalytic converter, take your car for a short drive to see if it runs better.
Do not shy away from testing the engine by driving at high RPMs over 3000 for a long distance.
This will help in getting the catalytic converter really hot which will then burn out the clog inside it.
While doing so, keep a check on the coolant temperature to make sure that you do not overheat your car.
How Long Do Catalytic Converters Last — and Is It Worth Fixing One?
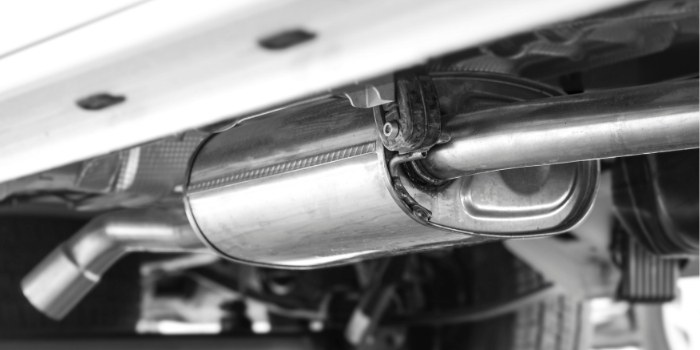
Catalytic converters are the unsung heroes of your vehicle’s emission system — quietly scrubbing harmful gases before they ever reach the atmosphere.
They’re not optional either: most countries legally require them as part of modern emission control standards.
Now, while they’re built to last, even the toughest catalysts have their limits. Let’s break down how long catalytic converters typically last — and whether fixing one is worth your time (and wallet).
Typical lifespan of a catalytic converter
In most cases, a catalytic converter will last the lifetime of the vehicle, often 10 years or around 100,000–150,000 miles. Many drivers never have to replace one at all.
However, lifespan depends heavily on driving conditions, fuel quality, and engine health.
The converter’s honeycomb substrate and precious-metal coating (usually platinum, palladium, and rhodium) can degrade over time if exposed to the wrong conditions.
Here are a few things that can shorten its life:
- Contaminated Fuel or Additives: Some fuel additives and engine treatments contain compounds that coat or corrode the catalyst surface, reducing its effectiveness.
- Overheating: An engine running too rich (excess unburned fuel) or too hot can cause thermal damage, melting the converter’s ceramic core.
- Oil or Coolant Leaks: If oil or coolant leaks into the exhaust stream, it can foul the catalyst and block exhaust flow.
- Short Trips: Frequent short drives prevent the converter from reaching its optimal operating temperature, leading to carbon buildup over time.
With proper maintenance and a healthy engine, your catalytic converter can easily outlive most other exhaust components.
Is it worth fixing or replacing a catalytic converter?
That depends on what’s wrong with it — and how bad the damage is.
If the converter is clogged but not melted, a professional cleaning or steam treatment can often restore its function and save you hundreds of dollars.
DIY solutions and fuel additives may help for minor buildup but won’t fix serious blockages or physical damage.
However, if your converter has failed an emissions test, triggered the “Check Engine” light (P0420/P0430 code), or is physically damaged, replacement may be your only option.
Replacement costs vary widely:
- Standard vehicles: around $900–$2,500, including labor.
- High-end models or dual-converter systems: can reach $3,000–$5,000 or more.
Keep in mind that driving with a bad catalytic converter can lower performance, increase fuel consumption, and cause your engine to run inefficiently — or even fail inspection.
How much does it cost to replace a catalytic converter?
The cost of replacing a catalytic converter will vary depending on the make and model of your vehicle.
In general, though, you can expect to pay between $500 and $2000 for a new converter. Plus, the cost of labor will need to be considered.
If you are considering replacing your catalytic converter, it is important to consult with a qualified mechanic to get an accurate estimate of the cost.
Additionally, you should check with your local laws to see if there are any regulations regarding the replacement of catalytic converters.
Final Thoughts
Removing the old clogged catalytic converter for cleaning is often very easy on most cars. All you will need to loosen out the rusty bolts.
If, however, the catalytic converter in your car is installed directly on the turbocharger (which might be the case in some car models) the removal may become difficult.
If you think that your catalytic converter is clogged slightly, products such as Oxicat cleaner works pretty well.
It may save you some money and the best part is you can do all the cleaning without removing the catalytic converter.
In case your catalytic converter is still causing the problems, it’s best to take it to the mechanic to get it checked and replaced.
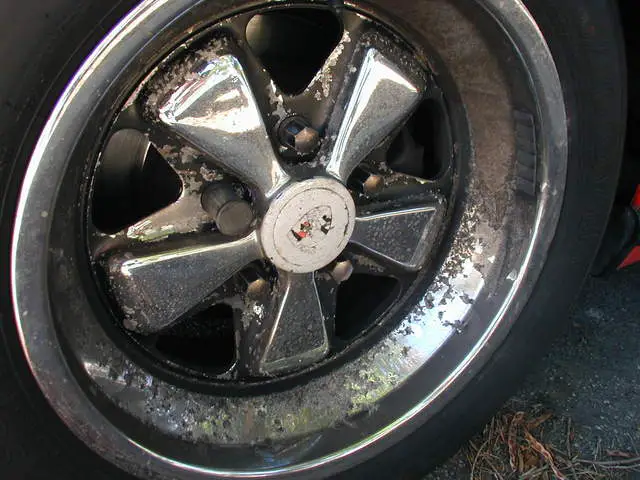
Chrome-plated aluminum wheels look stunning when they’re new, but over time, that bright shine often turns into a headache. Flaking, Read more
Spring is a beautiful time of year — birds sing, flowers bloom, and tree pollen paints your once-glistening new white Read more

It's happened to all of us. You're driving along, and all of a sudden, you smell something awful. Chances are, Read more

The awful smell, like a rotting fish, in your car can be hard to tolerate. And the worst thing is Read more

Based in Orem (Utah) John Paterson graduated from Utah Valley University and has begun writing in 2009. He has a large wealth of experience in writing articles related to cars, automotive repair, wheels, cleaning/maintenance, and much more. He has also written instructional articles in a similar niche for a few online publications as well. Currently, he works as a mechanic in his personal garage shop where he loves serving his countrymen from his heart.