

Ever heard the saying, “What’s underneath matters most”?
When it comes to your car, that’s spot on. While the exterior gets all the admiration, it’s the underside that takes the real beating — from gravel, salt, sand, and slush.
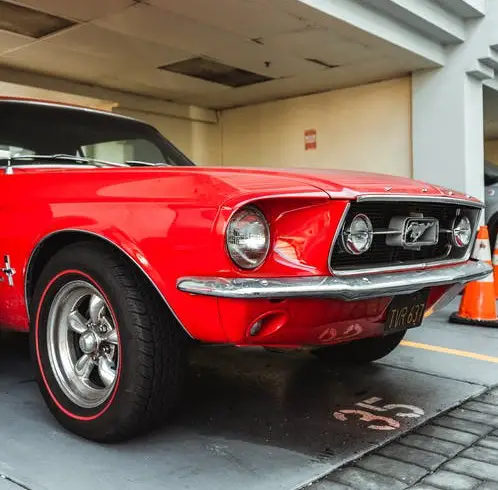
That’s where vehicle undercoating steps in, acting like invisible armor that shields your car from rust, corrosion, and road noise.
Undercoating your car is a simple yet powerful way to extend your vehicle’s life, keep rides quieter, and make cleaning easier.
Of course, no hero is flawless — undercoating can trap moisture and complicate inspections if not done right.
But with changing climates and unpredictable roads, skipping it is like leaving your car to battle the elements bare-handed.
So, if your vehicle’s underbelly is feeling neglected, it might be time for a protective makeover.
Curious about how undercoating works and what it’s made of? Let’s dig deeper.
Different Types of Undercoating
Undercoating comes in a variety of forms, ranging from do-it-yourself sprays to expert coatings.
Some of them are as follows:
1- Water-Based
These undercoatings are common among DIYers. These undercoatings are available in the aerosol form at car parts retailers.
Water-based undercoatings are thin and dry quickly.
This sort of coating can be applied by automobile businesses that provide low-cost undercoating services.
The disadvantage of water-based undercoatings is that they need to be redone very frequently.
The tiniest abrasion that breaks through the undercoating can sometimes necessitate the application of a fresh coat.
Even if the product is inexpensive, repetitive undercoating might add up.
2- Paraffin Based
These undercoatings are slightly stronger than the preceding undercoating which is water-based undercoating.
Undercoatings based on paraffin can be acquired in spray and paint-on forms from an automobile retailer.
This sort of coating is likewise thin-set and dries quickly.
This is available as an option when purchasing a new car, or it may be professionally done by an automobile service.
Undercoating made of paraffin must be redonned at least once a year at the expense of the vehicle owner.
3- Petroleum-Based
These undercoatings are manufactured from oil and have better deflective properties against road salts and dirt.
The petroleum foundation repels water and ice more effectively than paraffin or water-based undercoatings.
These undercoatings can be done at the time of purchasing the vehicle which you can get done by professionals.
This sort of undercoating must also be updated at the owner’s expense once a year.
4- Rubber Based
The is by far the second strongest undercoating for cars.
This form of undercoating provides more flexibility in the undercarriage and is more resistant to harsh terrain.
Undercoatings based on the rubber are available in spray and paint-on forms.
Because of the thickness of the application, it is best advised to have pros do it for you to guarantee optimal coverage.
This rubber-based undercoating can also be done while buying the car.
5- Asphalt Based
The strongest undercoating of them all. It is seen on all-terrain vehicles and military vehicles.
Asphalt-based undercoating will last the longest and is the ideal choice for cars that get a lot of road use.
The thickest layer with the greatest damage-resistant qualities is asphalt-based undercoating.
It is only available through professional services and is the only form of undercoating that comes with a limited guarantee.
You can also get the strongest coating when buying a new car.
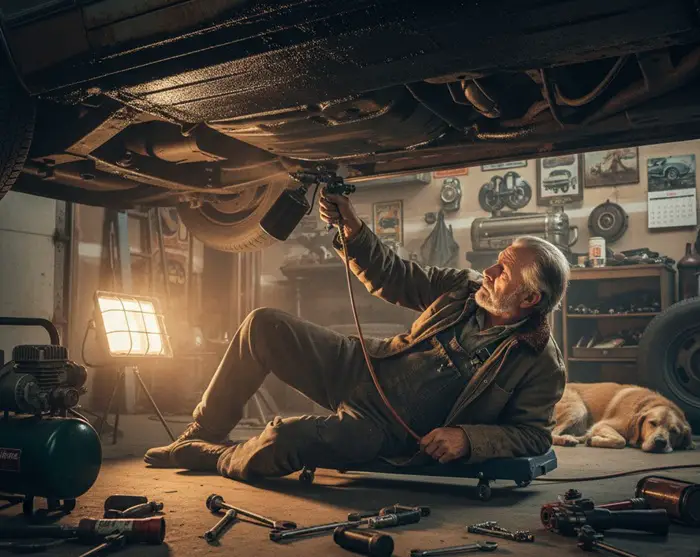
How to Undercoat Your Car Safely?
It is important to get your car undercoating if you want to extend its life and make it quieter to drive.
Properly undercoating the vehicle will keep the rust at bay and will protect the undercarriage of your car from lots of other gunk and debris.
Here are a few items you’ll need to safely undercoat your automobile.
- Hydraulic jack & car blocks
- Grinder
- Degreaser
- Towel
- Sandpaper
- Paintbrush
- Primer & paint
- Undercoating
Once you have these in place, you may start undercoating your car by following the steps given below.
Step #1 – Lift the Car
To lift a car at home for undercoating, start by placing the vehicle on a level, solid surface.
Use a hydraulic floor jack to raise the car, positioning the jack pad directly under a reinforced section of the chassis frame — avoid lifting from suspension components or body panels.
Once lifted, slide sturdy jack stands or blocks under the frame at designated support points, ensuring they are fully locked and stable.
Lower the car slowly onto the stands, confirming it sits securely and does not wobble.
Double-check that the stands or blocks are evenly positioned and that there’s sufficient clearance underneath for safe movement while applying the undercoating.
Always keep a wheel chock on at least one wheel to prevent accidental rolling, and never rely solely on the hydraulic jack to support the vehicle.
Step #2 – Clean the Undercarriage
once you have positioned your vehicle, thoroughly clean the entire undercarriage using a high-quality degreaser, removing oil, grease, and grime.
Next, inspect the metal for rusted areas. Use a grinder or wire brush attachment to remove heavy rust spots, followed by metal sandpaper for any minor corrosion or surface rust.
After grinding and sanding, wipe the underbody clean with a lint-free cloth or compressed air to remove all dust and debris.
A clean, rust-free surface ensures proper adhesion of the undercoating and maximizes protection against corrosion. Don’t rush — proper prep here determines the durability of your undercoating.
TIP: Always work in a well-ventilated area, as undercoating involves chemicals that can emit strong fumes.
Safety first: wear gloves, safety goggles, and a mask to protect yourself from dust and chemical exposure.
Step #3 – Apply the primer and paint
Once all rust has been removed and the undercarriage is thoroughly cleaned, it’s time to apply a primer.
Use a rust-inhibiting automotive primer and apply it evenly to all exposed metal surfaces.
This will create a protective layer that prevents future corrosion and ensures better adhesion for the paint.
Allow the primer to dry completely according to the manufacturer’s instructions — rushing this step can compromise the finish.
Next, apply a coat of high-quality black automotive paint over the primed areas.
This not only provides additional protection but also gives the underbody a uniform, finished look. Make sure to apply the paint evenly, avoiding drips or pooling.
Allow the paint to dry fully before moving on to the final undercoating step. Proper drying at this stage is crucial for a durable, long-lasting protective layer.
Step #4 – Apply the undercoating
With the primer and paint fully dry, you can now apply the automobile undercoating. Using a paintbrush or undercoating spray, coat the entire underbelly of the vehicle generously.
Focus on areas that are most exposed to the road, including wheel wells, frame rails, suspension components, and other metal surfaces prone to corrosion.
Apply the first layer evenly, ensuring full coverage without missing any spots.
Allow this layer to dry for about an hour before applying a second coat for added protection. Once the second coat is applied, let the vehicle sit and dry completely overnight.
Before driving, double-check that the undercoating is fully cured.
This ensures maximum protection against rust, corrosion, and road debris, giving your car a longer life and a quieter, more resilient ride.
Step #5 – Inspect and Maintain Your Undercoating
Once the undercoating is fully dry, take the time to inspect your work carefully.
Look for any thin spots, missed areas, or uneven coverage, especially in corners, seams, and around suspension components.
Touch up any areas that may need additional coating to ensure complete protection.
Going forward, regular maintenance is key. Wash your undercarriage periodically to remove dirt, salt, and debris that can degrade the coating over time.
After harsh winters or long trips on gravel roads, inspect for any damage and reapply undercoating if necessary.
A little attention now goes a long way: with proper inspection and upkeep, your vehicle’s underbelly can stay rust-free, durable, and quieter for years, extending the life of your car and protecting your investment.

Can You Use Motor Oil to Undercoat a Car?
Applying motor oil to the car’s undercarriage will form a protective layer on the metal to prevent it from rusting.
The good thing is it’s less expensive, more effective, and long-lasting than rubberized coatings, which will tend to chip and peel quickly in extreme weather conditions.
In winter, when your vehicle needs better protection from the salt used to clear snow from streets, you can use motor oil to your advantage to quickly undercoat your car in a DIY way.
Just follow the steps below to apply a motor oil undercoat to protect your car:
- Use jack stands, an automotive lift, or a set of drive-on ramps to lift your car from the front.
- With a pressure sprayer, rinse the undercarriage of your car nicely – wash under the engine, followed by fenders and wheels.
- Allow the undercarriage to dry for 1-2 hours and then, with a compressor sprayer, spray used motor oil on all the parts, including joints, rocker panels, inside door seams, under the fenders, and in the tire wells.
Do not spray the engine oil on wires and oil plugs.
After you are done with the front of the vehicle, lower it and raise the rear of the vehicle.
The Difference Between Rust Protection and Undercoating
Undercoating and rust protection may seem to be similar but they are two different things.
Where the undercoating is done for protecting your vehicle from the outside, rust protection is generally done for protection inside your vehicle.
Since there is a variety of different coatings available in both, the type of automotive undercoating you need is determined based on the level of damage and how much protection your vehicle wants.
One thing to keep in mind is – if your car model was manufactured before 2006, you definitely need some kind of protection from rust and an undercoat.
The car models and the automotive parts manufactured after 2006 are mostly built with galvanized steel (with a zinc coating).
Since it’s a great material that can reduce the chances of getting rust, most modern cars will not need undercoating very soon.
With that said, you still need to keep the underneath of your car, motorhome, trailer, or RV free from dirt, debris, grime, and soiled water.
How Long Does it Take to Prepare and Undercoat Your Vehicle?
The total time it takes to undercoat a car depends on a few factors, including the size of the vehicle, how thorough the prep work is, the type of undercoating used, and drying times.
Here’s a breakdown:
1. Vehicle Preparation and Lifting – 30 to 60 minutes
Before you even touch the undercoating, you need to make sure your car is safely lifted and stable.
Think of this as the “safety first” step — it might take a bit of time, but it’s worth it.
Position your vehicle on a level surface, use a hydraulic jack to lift it, and secure it with jack stands under the reinforced chassis points.
Take a few extra minutes to double-check everything is solid — a wobbly car is not worth the risk, no matter how eager you are to start painting.
2. Cleaning the Undercarriage – 1 to 2 hours
This is where the real elbow grease comes in. You’ll need to scrub off dirt, grease, and road grime, and tackle any rust spots.
Use a degreaser, a grinder for heavy rust, and sandpaper for smaller spots. Don’t rush this — the cleaner your undercarriage, the better your primer, paint, and undercoating will stick.
A few extra minutes here can save you headaches down the line when your coating starts peeling or rust creeps back.
3. Primer and Paint (if needed) – 2 to 4 hours
If you’ve had some rust to deal with, applying a rust-inhibiting primer is the next step. It’s like giving your car a first line of defense.
Once the primer dries, add a coat of automotive paint to seal the surface and create a smooth, uniform base.
Each layer needs time to dry fully — rushing this will compromise adhesion. Think of it like letting cake layers cool before frosting; patience now pays off later with long-lasting protection.
4. Applying the Undercoating – 1 to 2 hours
Finally, the main event: the undercoating itself. Whether you’re brushing it on or using a spray, make sure every inch of metal exposed to the road gets covered.
Apply a generous first coat, wait an hour, then add a second coat for maximum protection. Don’t stress if it feels slow — even coverage now means fewer worries about rust in the future.
5. Drying and Curing – Overnight (6 to 12 hours)
Even though the coating might feel dry to the touch after a few hours, full curing takes time. Ideally, let the car sit overnight or at least 6–12 hours before driving.
This ensures the coating fully bonds and provides the durable, long-lasting protection you’re after. Think of it as letting your hard work “set in,” so the payoff lasts for years.
In total:
- Active work: ~5–8 hours
- Including drying: ~12–16 hours
It’s not exactly a weekend sprint, but the results are worth it — a clean, protected undercarriage and a car that’s ready to take on anything the road throws at it.
Does the Type of Vehicle Make a Difference?
Yes — the type of vehicle you’re working on can affect both the process and the time it takes to undercoat.
Larger vehicles like full-size SUVs (Toyota Land Cruiser, Ford Expedition) or pickup trucks (Ford F-150, Toyota Hilux) have more underbody surface area, meaning more cleaning, painting, and coating work.
These vehicles often have exposed frame rails and heavy-duty suspension parts, so you’ll spend extra time making sure every nook and cranny is covered.
Smaller cars, like sedans (Honda Civic, Toyota Corolla) or compact SUVs (Hyundai Tucson, Kia Seltos), are quicker to prep and coat because there’s less surface area and the undercarriage is more accessible.
Even among vehicles of the same size, design matters. Cars with complex exhaust layouts or intricate suspension systems require careful maneuvering of brushes or spray nozzles to avoid missing spots.
So, knowing your vehicle type helps you plan your time and approach for a thorough, effective undercoating.
How Long Does the Undercoat on My Car Last?
The lifespan of an undercoat depends on several factors: the type of undercoating used, the climate you drive in, and how well you maintain your car. Generally:
- Rubberized undercoating can last 3–5 years. It’s flexible, good for sound deadening, and handles road vibrations well.
- Asphalt-based or bitumen undercoating is heavier and more durable, typically lasting 5–10 years, but can crack in extreme cold.
- Spray-on polymer coatings can last up to 10 years if applied properly and maintained.
Environmental factors play a big role. Cars driven in salty winter roads, coastal areas, or off-road conditions may experience faster wear.
Regular inspections and touch-ups can significantly extend the life of your undercoat.
In short, with proper preparation, application, and maintenance, undercoating can protect your vehicle for many years, keeping rust and corrosion at bay.
Final Words
Undercoating a car is not only a sensible strategy to extend its lifespan, but it also prevents seizing important elements of a car like suspension and brakes.
When correctly placed, an automotive rustproof undercoating can protect an undercarriage from all manner of unpleasant stuff.
This includes everything for seawater, deicers, road filth, corrosive chemicals, engine oil, and a variety of other corrosion-causing pollutants.
However, it is still necessary to wash your car and its underneath regularly using pH-balanced shampoo.
Rusting pollutants will always do their damnedest to ruin your vehicle, so pull out that “winter coat,” and don’t forget about the shining topside, which can also be easily rusted and corroded.
That’s it for this guide, hope you found it helpful, and all the best with the undercoating of your vehicle.
There’s nothing quite like the heart-sinking realization that your license plate screw has become one with your car. Rusted, stuck, Read more
Nothing ruins a summer drive faster than stepping into a car that feels like a sauna. Or a winter commute Read more
If you’ve ever walked out to your car in the morning only to find a pack of neighborhood dogs treating Read more
No doubt, the tires of cars with their rims enhance the quality of their appearance. Not only just aesthetically but Read more

Based in Orem (Utah) John Paterson graduated from Utah Valley University and has begun writing in 2009. He has a large wealth of experience in writing articles related to cars, automotive repair, wheels, cleaning/maintenance, and much more. He has also written instructional articles in a similar niche for a few online publications as well. Currently, he works as a mechanic in his personal garage shop where he loves serving his countrymen from his heart.