If you’re like me, you most likely love spending time outdoors and enjoying all that nature has to offer.
From camping and fishing to hiking, biking, and painting in the backyard, there’s always something new to explore.
But what do you do when your favorite pastime leaves its mark on your vehicle?
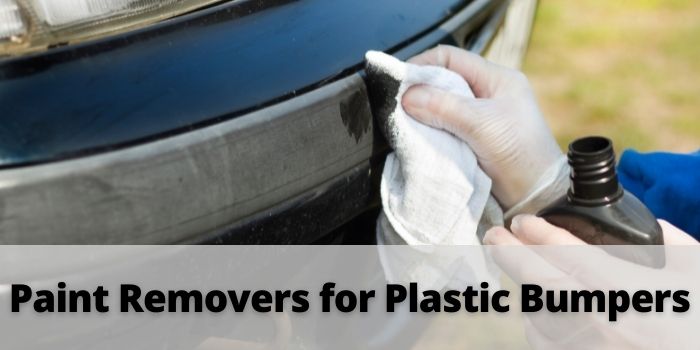
Paint can be tough to remove from plastic bumpers, but fear not – I have a few tips that should help get the job done. So, keep reading for more information!
Table of Contents
Best Paint Removers for Plastic Bumpers
Before you get started, it’s important to know what you cannot use for paint removal from plastic.
Acetone, paint thinner, and lacquer can be harsh on most plastic and can potentially damage the surface. You should avoid them at all costs.
Also, always test any cleaners in an inconspicuous area before applying to the entire bumper.
1- Isopropyl Alcohol – For Oversprays
IMO, isopropyl alcohol (rubbing alcohol) works best for oversprays on plastic and can be found at any local drugstore.
Just be sure to use the 91% or higher variety – the lower percentages have too much water and won’t work as well.
To use this product, you may need to apply some elbow grease, but it should eventually work best without damaging the plastic surface and the underlying paint finish.
- Use a soft cloth or sponge to apply the rubbing alcohol to the affected area.
- Gently rub the solution into the paint until it begins to lift.
- Wipe away the lifted paint with a clean cloth.
- Repeat as necessary until all the paint is removed.
2- WD-40 – For Paint and Rust Stain Removal
If you’re looking for a multi-purpose solution, WD-40 is your best bet.
Not only can it be used for removing paint from plastic parts of your vehicle, but it can also be used for protecting metal surfaces and removing rust.
For best results, spray WD-40 onto the targeted area and wait a few minutes before wiping it away with a clean cloth. You might have to repeat this process a few times to remove all the paint.
If you’re trying to remove latex paint or acrylic paint, then motor oil can also be a good option.
For this hack, you’ll need some motor oil. Apply it to the area with paint and wait a few minutes. Afterward, use a clean cloth to wipe away the dried paint.
3- Naphtha – For Removing Stubborn Oil-Based Paints
If you’re trying to remove oil-based paints from plastic body parts, naphtha can be a good option.
Naphtha is a petroleum-based solvent that can be used for removing paint from plastic.
Apply the naphtha to the damaged area and let it sit for several minutes. Then, use a separate clean cloth to wipe away any residue. Repeat this process until all paint is removed from the surface.
If you’re trying to remove stubborn paint from plastic, then you may need to use a citrus-based cleaner.
4- Distilled Vinegar and Warm, Soapy Water- For Removing Water-Based Paints
To remove water-based paints from plastic, you can create a DIY solution using distilled vinegar and warm soapy water.
To use this method, simply mix together 1 part vinegar and two parts warm soapy water.
Then, apply the solution to the affected area and scrub gently with a clean cloth.
Wipe away the lifted paint with a clean cloth and try to repeat as necessary until all the paint is gone.
As an alternative to the above, you can also create a DIY solution using baking soda and water by mixing 1 part baking soda and two parts water.
Cooking oils such as canola or safflower oil can also be used to remove oil-based paints from plastic if you do not have the above products available at home.
5- Goo Gone Adhesive Remover – For Removing Glue or Other Adhesive-Based Residues
There are a few different products on the market that can be used for removing glue on your vehicle’s body, but I find that Goo Gone works best.
Goo Gone Adhesive Remover is an easy-to-use product for removing glue or other adhesive-based residues from plastic.
To use, simply start by wiping the plastic surface with a damp cloth to remove any dirt and debris.
Then apply enough Goo Gone Adhesive Remover to the plastic surface so that it is completely covered.
Allow the Goo Gone to remain on the plastic for about 5 minutes, then wipe off any excess with a clean cloth or towel.
Repeat as needed until all of the glue or residue has been removed from the plastic.
With just a few simple steps, you can have your plastic surfaces free of ugly glue and residue in no time!
Tips and warnings
- Use gloves and eye protection when working with chemicals
- Work in a well-ventilated area
- Dispose of all chemical-soaked rags and materials properly
- Never mix chemicals together
Bonus Tip To Get Paint Scuff Marks Off a Truck Bumper
Paint scuff marks are caused due to scraping and rubbing of the paint on a truck bumper.
To get rid of this, you can use a variety of products that are available in the market, such as rubbing compound, polishing compound, and scratch remover.
Rubbing compound is a mild abrasive that helps to smoothen out minor scratches and scuff marks. It also helps to restore the shine of the paint.
Start by washing and drying your bumper before applying a rubbing compound to it. Use a soft cloth or sponge to apply the compound in circular motions. Work your way around the bumper and buff it until you get a glossy finish.
Polishing compound is another effective product for removing scuff marks from a truck bumper.
Start by washing and drying the bumper before applying a small amount of polishing compound using a soft cloth or sponge.
Rub the polish into the bumper in circular motions and buff it with a clean, soft cloth for best results.
One other excellent option is to use a Magic Eraser. These are powerful cleaning tools that can be used on a variety of surfaces, including paint.
To use a Magic Eraser on a truck bumper, simply wet the pad and squeeze out any excess water. Then, gently rub the pad over the affected area.
For best results, it’s important to use a light touch when using Magic Eraser on paint. Too much pressure can cause the pad to damage the paint.
If you’re cleaning a large area, it’s a good idea to work in small sections so that the pad doesn’t dry out. Once you’re finished cleaning, rinse the area with water and dry it with a clean towel.

Based in Orem (Utah) John Paterson graduated from Utah Valley University and has begun writing in 2009. He has a large wealth of experience in writing articles related to cars, automotive repair, wheels, cleaning/maintenance, and much more. He has also written instructional articles in a similar niche for a few online publications as well. Currently, he works as a mechanic in his personal garage shop where he loves serving his countrymen from his heart.

