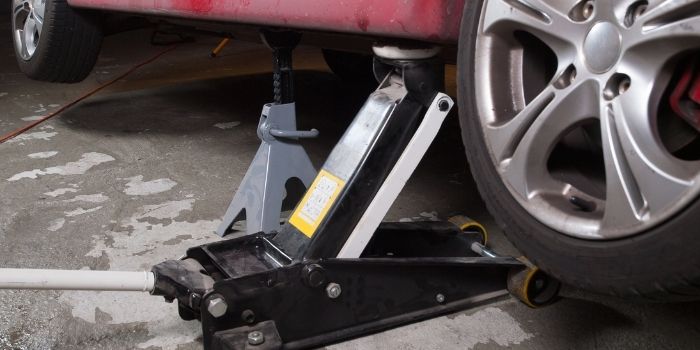
Do you work on or own a car?
It’s natural to want to be known as a do-it-yourselfer.
Wrenches, screwdrivers, pliers, and hammers are often required at garage shops.
However, this is insufficient for large tasks, necessitating the use of the most overlooked gear, a floor jack.
Even if it is useful, it might be annoying if you discover that the item you purchased is not large enough to raise as required.
Homemade floor jack extensions come to the rescue in that case. Yes, with a bit of preparation you can easily make the one in your garage to get the job done.
In this article, we’ll go over the different types of floor jack extensions, how you can make one yourself at home and how to use it correctly.
So, without any further ado, let’s get started.
Table of Contents
Different Types of Floor Jack Extensions
The following are the main kinds of floor jacks available.
a) Homemade Jack Extension
While purchasing jacks ensure a maximum lift, there are situations when you need it to go significantly higher.
The good news is that designing a floor jack extension is one option for keeping you safe from lifting hazards.
It is feasible to build a useful and purpose-built jack extension with enough imagination.
On the road, nerve-racking incidents might occur at any moment, and purchased one would not operate flawlessly.
Your activities may get smoother if you build one yourself.
One easy and safe approach is to place wood under the floor jack.
An extension of this kind elevates both off-road vehicles and cars with huge tires. Because it is tailored to your preferences, the solution is reasonably priced.
Furthermore, removing the wheels from the ground requires less time and effort. It may be used several times without causing problems or necessitating replacements.
This is the most cost-effective alternative to purchasing the finest designs for hefty work. The equipment works well, particularly if you need to raise the automobile.
b) Manufactured Floor Jack Extension
It is sometimes worthwhile to rush to a designer or extension vendor. The rationale for this is that you will stock your tool bag with genuine items.
The gamble here is that you obtain a powerful and efficient lifter that can handle huge vehicles.
When it comes to replacing tires or repairing brakes, convenience is all that is required. So choosing something strong enough to support any car you’ll no longer have to be concerned about heavyweight machine lifting.
Factory-made extensions are highly-liked when they function well with existing jacks.
Unless it is properly manufactured, not all jack models will fit any other jack models.
However, if you want to use one on an existing jack, you’ll need to buy a floor jack lift pad.
It never hurts to try your hand at both worlds.
You may purchase a standard-sized one for your garage or swiftly add an extension to the rear of your vehicle.
4 Steps To Make Your Own Floor Jack Extension
The primary applications for purpose-built floor jacks are maintenance and repair.
Now, the issue is generally whether you should purchase one or create one.
The issue is that the majority of the promoted models do not raise large and lengthy automobiles to a suitable height.
If you have a garage, you may do some DIY work to make a floor jack extension for lifted vehicles and enjoy an additional lift.
Prerequisite materials:
- 1.5-inch round stock aluminum
- Wood
- Drill
- Measuring tools
Step #1: Begin by twisting the side that is resting on the jack’s saddle hole. Use the appropriate procedure to cut the aluminum material to the required size.
Because you are concerned with quality, aluminum is employed since it is light in weight.
Choose a measurement that is a little larger than half an inch.
Step #2: Then drill the end into which the floor jack extension saddle will be inserted.
As is customary, the other end measures more than half an inch in length. Drill the hole as desired and neatly as possible.
You will observe that the technique is not too difficult and that the kit fits into another easily.
Step #3: You should be able to access the cotter pin via the drilled hole in the extension end.
In that manner, it is securely fastened to the jack and aligned with the middle line.
Then test the component that you have created with care.
Check to ensure the wood expansion fits and can support the weight of your vehicle. Such as being capable of lifting a small or medium-sized car without risk of injury.
Step #4: If anything breaks, it is a warning indication that there will be a major collapse so wear safety equipment such as glasses, caps, and thick coats when working.
The floor jack extension handle should last a long time and also fit into the carrying case.
Making this not only means that you will save money, but you will also be able to support the weight of your automobile.
Well, the skill may be exaggerated at times. Materials such as wood or welded metal may be used to construct the extension.
In any case, having a floor jack extension for raised vehicles is convenient.

How To Use Your Floor Jack Extension Correctly?
When changing brake pads, tires, or even oil, jacking up an automobile is required.
Even though the scissor jack is included with the automobile, it is difficult to operate.
A floor jack, on the other hand, will function swiftly and effortlessly to certain heights. But convenience is one thing, and safety is quite another.
So, here is a safe way to utilize a floor jack extension.
1- Work on a flat surface
Using a jack extension is a straightforward process. You can elevate and lower the automobile once you have a purpose-built floor jack saddle, either manufactured or homemade.
Examine the working environment to ensure that the task is done safely and painlessly.
2- Chock the remaining tires
The first step is to block and fasten the car’s tires so that will not be elevated.
If this is verified, carefully lower the jack until it hits the undercarriage.
The jack stands should be placed deep underneath, aligned, and then slowly elevated.
3- Set up the jack and pump
In all circumstances, it is essential to place the extension to the required height with great steadiness.
Then, move the jack unit beneath the car, particularly where you wish to elevate it.
This is significant because if the saddle is moved off-center, the circumstance may not be favorable.
Pump the handle slowly until it makes solid contact, then elevate to a comfortable working height.
Jacks vary in design, but the finest varieties can reach a working height with as few pumps as possible.
Some simply need three pumps to elevate or get ready for work.
Check the direction the jack is raising the weight if the floor jack extension saddle begins to compress the load.
It should be upright with little horizontal loading. Extreme horizontal weights might cause the car to fall off the jack while the extension remains in place.
4- Bring the car down
Lowering the car can now be done in the other direction by utilizing the floor jack extension handle.
Keep in mind that there is a risk of injury while using extensions.
So, before beginning the procedure, plan thoroughly and then perform the work effortlessly.
Remember that the tool is not compatible with all jack types; it is also a good idea to consider a floor raise pad.
That way, you’ll have the finest lifting experience you’ve ever had.
So, this is all about floor jack extension, making your own, and using it the right way.
Hope it helped.
And if you liked what you read, please let us know in the comments, and don’t forget to share it with other DIYers around you who you think may help.

Based in Orem (Utah) John Paterson graduated from Utah Valley University and has begun writing in 2009. He has a large wealth of experience in writing articles related to cars, automotive repair, wheels, cleaning/maintenance, and much more. He has also written instructional articles in a similar niche for a few online publications as well. Currently, he works as a mechanic in his personal garage shop where he loves serving his countrymen from his heart.


