
If your car has been sitting around for months — maybe waiting for a repair, or just tucked away during the off-season — there’s a good chance the gas tank isn’t as clean as you think.
Old fuel doesn’t just sit quietly; it slowly breaks down, leaving behind varnish, rust, and grime that can choke your engine the moment you turn the key.
Ignoring that buildup might seem harmless now, but it’s one of those hidden issues that can quietly ruin fuel pumps, clog injectors, and lead to expensive repairs later.
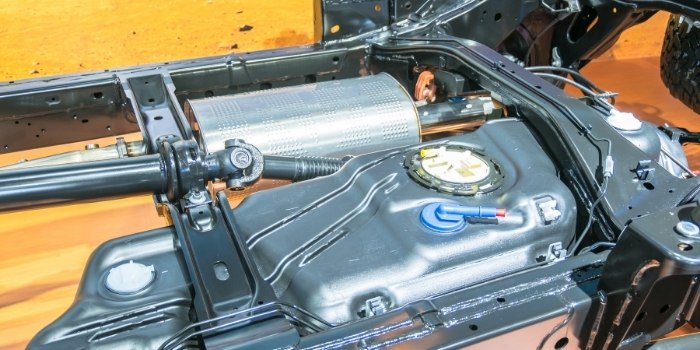
The tank may be sealed to prevent spills and evaporation, but that same design traps all the gunk inside — until you deal with it.
The good news is that cleaning it isn’t as complicated as it sounds. You don’t need to take the whole tank apart or pour in harsh chemicals that could damage your vehicle.
With a few smart steps and a bit of care, you can easily bring your fuel system back to life.
Here’s how to clean a gas tank that’s been sitting for a while — safely, effectively, and without the headaches of a full teardown.
Cleaning the Inside of a Gas Tank in a Car
Before you start, make sure you’re working in a well-ventilated area — preferably outdoors or in a garage with open doors.
Gas fumes are toxic and flammable, so avoid any sparks, cigarettes, or open flames nearby. Wear protective gloves and safety glasses for extra caution.
Then follow this step-by-step guide…
Step 1: Drain the Old Fuel
Start by draining out any old fuel from the tank. Use a siphon pump or disconnect the fuel line and let the gasoline flow into an approved fuel container. Dispose of the old fuel properly — don’t pour it down drains or into the soil, as it’s both harmful and illegal.
Once drained, take a look inside (using a flashlight, not a lighter!) to get a sense of how dirty it is. If you see rust or sticky residue, it’s definitely due for a good clean.
Step 2: Remove the Tank (If Possible)
If you’re comfortable doing it, removing the tank gives you better access for a deep clean. Check your car’s manual for instructions on how to safely detach the fuel tank.
However, if removal feels too technical, don’t worry — you can still clean it effectively while it’s in place using the method below.
Step 3: Rinse and Loosen the Gunk
Pour a few litres of clean fuel or a mixture of warm water and mild detergent (for metal tanks only) into the tank.
Give it a good shake — or gently rock the car if the tank is still attached — to help loosen up any dirt, varnish, or rust flakes stuck inside.
If the buildup is severe, add some fuel system cleaner or vinegar and baking soda (for mild rust) and let it sit for a few hours.
Step 4: Scrub and Rinse Again
For removable tanks, use a long brush or a handful of small, clean nuts and bolts — swirl them around inside to help knock off the rust.
Once done, drain the mixture completely and rinse the tank several times with clean fuel or water until no debris comes out.
Step 5: Dry the Tank Thoroughly
Moisture is your enemy here. Any leftover water can cause rust to form again.
Let the tank dry completely — you can leave it in the sun for a few hours or use compressed air to speed up the process.
Step 6: Reinstall and Add Fresh Fuel
Once it’s dry, reattach the tank carefully, making sure all hoses and fittings are tight.
Pour in fresh, clean fuel — ideally, use a bit of fuel stabilizer if the car will sit again for long periods.
Step 7: Start the Engine and Check for Issues
Finally, start your engine and let it idle for a few minutes. Listen for any irregular sounds and watch for leaks or sputtering.
A smooth, steady idle is a good sign that your tank and fuel system are back in top shape.
Can You Use Acid to Clean a Rusty Gas Tank?
If your gas tank has been sitting for a long time and has developed heavy rust inside, you might come across suggestions like “Muriatic acid takes off rust.”
While it’s true that muriatic acid (a diluted form of hydrochloric acid) is extremely effective at removing rust, it’s also very dangerous to use — especially on something as sensitive and crucial as a fuel tank.
Here’s what you should know before considering it:
Muriatic acid can strip away rust quickly, but it doesn’t stop there — it can also eat into the bare metal beneath if it’s left too long or not neutralized properly.
That means while it might clean your tank fast, it could also weaken it or cause microscopic corrosion that leads to leaks later.
The acid also gives off toxic fumes and can react violently if mixed with other chemicals, making it unsafe for most DIY setups.
If you still choose to use it, extreme caution is required: wear proper protective gear, work in a well-ventilated outdoor area, and neutralize the tank immediately afterward with a baking soda and water solution.
But honestly, unless you’re experienced and know exactly what you’re doing, it’s best to avoid muriatic acid altogether for this job.
A safer alternative is to use white vinegar, a rust remover like Evapo-Rust, or a fuel system cleaner — all of which dissolve rust effectively without damaging the tank or creating hazardous fumes.
In short, yes, muriatic acid takes off rust, and it can clean rust out of a gas tank that has been sitting — but the risks far outweigh the benefits.
For most car owners, sticking with gentler, non-corrosive options is a smarter and safer choice.
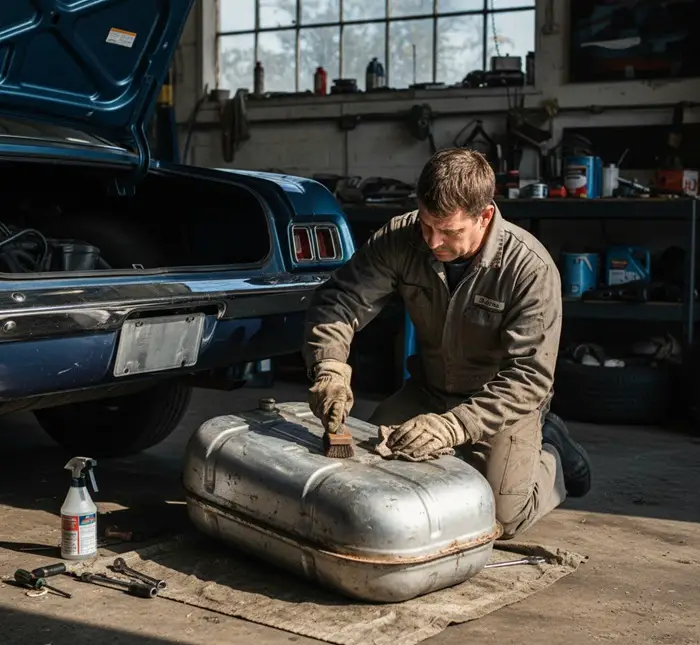
How to Wash Your Car’s Fuel Tank from the Outside?
When it comes to fuel tank maintenance, most people only think about cleaning the inside — but the outside matters too.
Over time, dirt, mud, road grime, and even salt can build up around the tank, especially if you drive in wet or dusty conditions.
This not only makes your car look neglected but can also trap moisture and cause corrosion on metal tanks.
Here’s a step-by-step guide to do it safely and effectively:
Step 1: Disconnect the Battery (Optional but Recommended)
If you plan to clean under the car or near electrical components, it’s best to disconnect the battery’s negative terminal. This adds an extra layer of safety when working around fuel systems.
Step 2: Access the Tank
For cars with visible tanks (like trucks, SUVs, or older models), you can easily reach the tank from underneath. If your car has a tank shield or cover, you might need to remove it temporarily for better access.
Use a flashlight to inspect the surface and note areas with heavy grime, mud, or rust spots.
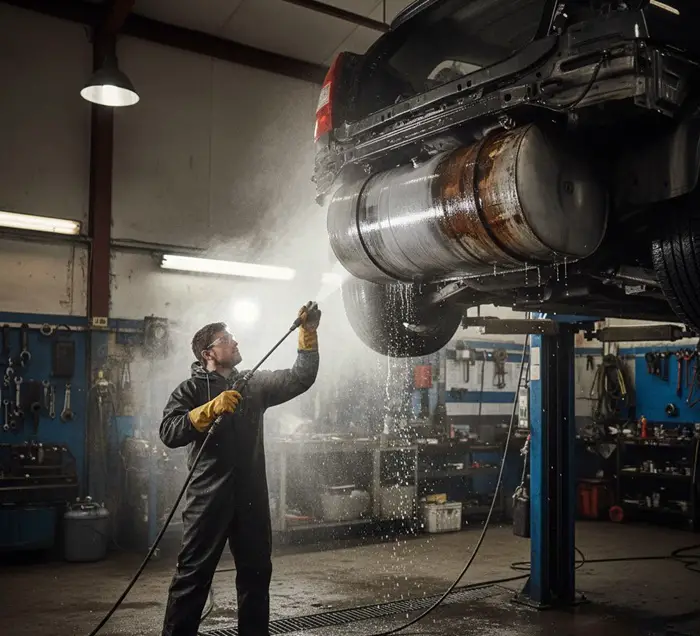
Step 3: Rinse Off Loose Dirt
Start by spraying the tank gently with water to remove loose dust and debris. Avoid using a high-pressure jet directly on fuel lines, caps, or electrical connectors — too much pressure can damage them.
Step 4: Apply a Degreaser or Mild Cleaner
Spray a degreaser or a mild automotive cleaner onto the tank surface. These cleaners help break down stubborn oil stains and road grime. Let it sit for a few minutes, but don’t let it dry completely.
Then, use a soft brush or sponge to scrub the surface gently. Focus on areas with built-up dirt or light rust.
Step 5: Rinse and Wipe Dry
Once you’ve scrubbed the tank thoroughly, rinse off the cleaner with clean water. Make sure there’s no residue left behind. Wipe the surface with a clean microfiber cloth or let it air dry completely.
Step 6: Inspect for Rust or Damage
As the tank dries, inspect it closely. If you spot any rust patches, treat them with a rust remover or converter designed for automotive use.
For metal tanks, you can also apply a thin coat of protective spray paint or anti-rust coating once the surface is dry.
Step 7: Reattach Any Covers and Reconnect the Battery
If you removed any shields or covers earlier, reinstall them securely. Reconnect your battery and give the area one last look to ensure everything’s tight and clean.
Safety Precautions for Cleaning the Fuel Tank of Your Car
Before you start cleaning your fuel tank, safety should be your top priority.
Gasoline and its vapors are highly flammable, so taking proper precautions can prevent accidents and serious damage. Here’s what you should always keep in mind:
Park safely: Make sure your car is parked on a flat, level surface and that the engine is completely cool.
Never clean or wash a tank that’s hot or right after driving — fuel vapors can ignite easily, and water on hot metal can cause warping or cracking.
Keep a fire extinguisher handy: Always have a fire extinguisher nearby when working with or around gasoline. It’s a simple step that could save your life if something goes wrong.
Avoid skin contact with fuel: If you accidentally spill gasoline on your skin, wash it off immediately with soap and water. Seek medical help if you feel irritation or dizziness.
Handle leaks with care: If you notice a gas leak, do not start the car or attempt to fix it yourself. Move away from the vehicle and call a professional to inspect it safely.
Watch for damage: If you see signs of rust, flaking metal, or corrosion, stop cleaning immediately.
These are indicators that your tank may be compromised and should be examined by a mechanic.
Don’t ignore warning signs: Even if your tank looks fine on the outside, pay attention to any fuel smells, drips, or performance issues.
A clean-looking tank doesn’t always mean it’s completely safe.
By following these precautions, you’ll reduce risks and make sure your cleaning process is not only effective but also completely safe.
How to Tell If Your Fuel System Needs Cleaning (Top 5 Signs)
Tips to Make Your Gas Tank Run Smoothly In The Future
A clean fuel system keeps your engine running smoothly and efficiently.
But over time, deposits, rust, and old fuel residues can build up — affecting performance and mileage.
Here are the five most common signs that your fuel system needs a good cleaning:
1. Rough Idling or Hard Starts – If your car struggles to start, idles unevenly, or stalls unexpectedly, it’s often due to clogged fuel injectors or filters restricting proper fuel flow.
2. Poor Acceleration or Power Loss – When you press the pedal and your car hesitates, jerks, or feels sluggish, it usually means your engine isn’t getting enough clean fuel to perform efficiently.
3. Drop in Fuel Efficiency – If you notice your mileage dropping even though your driving habits haven’t changed, dirty injectors or buildup in the fuel system could be forcing your engine to burn more fuel than necessary.
4. Engine Knocking or Unusual Noises – Pinging, knocking, or sputtering sounds can indicate uneven fuel combustion — a common symptom of deposits in the fuel injectors or lines.
5. Check Engine Light or Fuel Smell – A glowing check engine light or a persistent gasoline odor may signal fuel delivery issues or leaks — both clear reasons to have your fuel system inspected and cleaned.
Smart Hacks to Keep Your Gas Tank Running Smoothly for Years
Cleaning your gas tank is a great first step — but keeping it that way is where the real difference lies.
Many car owners neglect their fuel system until problems show up: clogged injectors, poor mileage, or even engine trouble.
The truth is, a few small habits can go a long way in preventing all that.
Here are five practical, tried-and-true tips to help your gas tank and fuel system stay clean, efficient, and reliable in the long run.
1. Choose Quality Fuel — Every Time
Not all gas stations maintain the same standards. Poor-quality or contaminated fuel can introduce dirt, water, and ethanol deposits that lead to corrosion and injector blockages.
Whenever possible, fill up at trusted, high-turnover stations that are known for clean fuel. Spending a few extra rupees or cents per litre now can save you thousands in future repairs.
2. Avoid Running on Empty
Driving until the “low fuel” light turns on might seem harmless, but it can cause serious long-term damage.
When the fuel level is too low, sediment and impurities at the bottom of the tank get sucked into the fuel system, clogging filters and harming the pump.
Try to refill once the gauge hits one-quarter — it’s a simple habit that keeps your system cleaner and healthier.
3. Use a Fuel Additive or Stabilizer Periodically
If your car sits unused for weeks or months, stale fuel can break down and form gum-like deposits.
Adding a fuel stabilizer or system cleaner every few months helps dissolve residue, control moisture, and prevent rust formation. It’s especially useful before long storage periods or seasonal breaks.
4. Inspect for Rust, Moisture, or Leaks
Your gas tank’s exterior takes a beating from dust, road salt, and humidity. Make it a routine to inspect underneath your car every few months for signs of corrosion or damp spots.
Catching a small leak early can prevent a costly replacement later — and keeps your car safer on the road.
5. Drive Your Car Regularly
A sitting car is a suffering car. When you drive, fuel circulates through the system, lubricating seals and flushing out moisture.
Even short drives once or twice a week can make a big difference in keeping your gas tank and injectors clean.
Final Thoughts
Your gas tank may not be something you think about often, but it quietly plays one of the most important roles in keeping your car running smoothly.
A neglected tank can lead to rust, clogged injectors, and poor fuel efficiency — issues that often start small but can turn into costly repairs down the road.
Taking the time to clean your fuel tank and maintain it properly is more than just good car care — it’s an investment in your vehicle’s long-term health.
Whether your car has been sitting for a while or you simply want to prevent future problems, a clean tank ensures your engine always gets fresh, contaminant-free fuel.
Combine that with a few smart habits — like using quality fuel, keeping your tank at least one-quarter full, and driving regularly — and you’ll drastically reduce the chances of buildup, corrosion, or performance loss.
In short, don’t wait until you notice trouble before paying attention to your gas tank. A little preventive care today can help your car run cleaner, last longer, and perform like new for years to come.
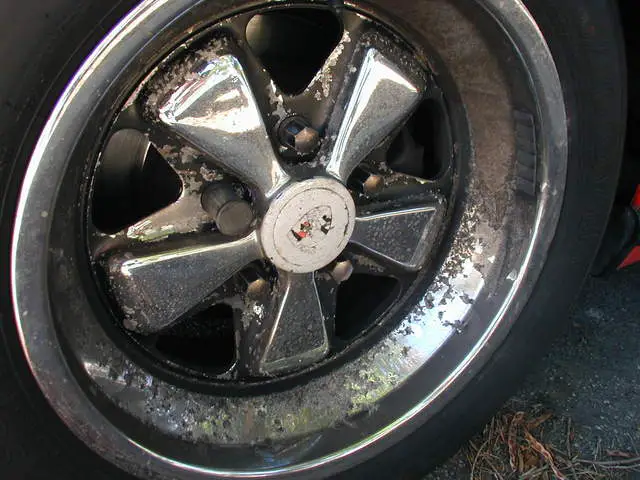
Chrome-plated aluminum wheels look stunning when they’re new, but over time, that bright shine often turns into a headache. Flaking, Read more

If you’ve ever walked out to your car in the morning only to find a pack of neighborhood dogs treating Read more

When you use your car for a long time, the tires are not as shiny as they used to be. Read more
If your car’s been feeling a little sluggish lately, don’t blame it just yet—it might be your catalytic converter crying Read more

Based in Orem (Utah) John Paterson graduated from Utah Valley University and has begun writing in 2009. He has a large wealth of experience in writing articles related to cars, automotive repair, wheels, cleaning/maintenance, and much more. He has also written instructional articles in a similar niche for a few online publications as well. Currently, he works as a mechanic in his personal garage shop where he loves serving his countrymen from his heart.